A Tree Change is A-Comin’

Have you seen the ‘make-under’ dolls that have become so popular of late?  This is where a preloved doll, like a Bratz doll, is given a ‘make-under’ and completely transformed in to a dolly with a more natural appearance.  The enormous eyes and lips are gone, the crazy hair and skimpy clothing replaced by something more down to earth.  More appropriate.  More accessible.  And more fun!

A group of Tree Change Doll kids ready to play outside. Picture courtesy of Tree Change Dolls on Facebook

The first I’d heard of a make-under doll was in February this year via this YouTube video.  Sonia Singh is a Tasmanian mum and artist who has been making under dolls she’s found at local tip shops for her own daughter.  Her process involves completely removing all traces of the heavy, stylized, makeup and hand painting a new face on each doll.  Sonia and her mum, Sylvia, then hand sew and hand knit new, more modest and age appropriate play outfits for each doll, and even make new shoes to replace the stripper heels the original Bratz dolls sport.  The end result is a completely refurbished, hand-styled doll that children say feels more like a friend, someone they might actually know in real life, dolls that are more friendly and fun to play with.

I can see what they mean.  The before and after pictures reveal a marked difference between the impossibly proportioned Barbies and trashy Bratz dolls, and the more natural Tree Change Dolls that Sonia creates.  Here is a recent example of Sonia’s work.

Picture from Tree Change Dolls facebook page.

Bindi – July’s charity doll. Picture from TreeChangeDolls.com

Sonia Singh and one of her Tree Change Dolls. Image from Tree Change Dolls on Facebook

I love this idea on so many levels.  First, there is the whole recycling piece.  Turning someone else’s trash in to treasure and preventing the unwanted dolls from becoming landfill.  Love that!

And then there is Sonia’s philosophy of taking dolls with hyper-sexualised features (ugh, truly truly awful) and transforming them in to what looks pretty close to being a kid you might actually know, all while providing an alternative, slightly feminist, certainly positive message to young girls.

And you know what else I love?  Sonia makes of point of not editing perceived ‘flaws’ that children might naturally have, like freckles, bushy eyebrows and buck teeth but adds them in to create personality.  Love that, too.

People just can’t get enough of these dolls.  Back in February Sonia’s original story was quickly picked up by social media and all of a sudden she become quite the viral sensation.  Her dolls, which she sells through her Etsy shop, are just about impossible to come by as they all sell out in a matter of minutes after every listing.  Clearly, Sonia has struck upon an underserved niche in the toy market and, no doubt, could make fists full of money by licensing with Mattel.  But instead of holding on greedily to her great idea Sonia has created a number of How-To videos to encourage regular peeps like you and me to have a go at upcycling old unwanted dollies ourselves.  How amazing is that?

So, of course, I had to give it a try 🙂

Here is the strumpet, Jazzmyn, I picked up at a local op-shop.  She was $2.50.  Not as whorey as I was hoping to find, quite honestly, but still.

image   image

And after a bit of tinkering, here she is now.

DSCN0514DSCN0526DSCN0542

I think she turned out pretty well for a first try.  My kids love her.  And it was a lot of fun to make her some new clothes, boots and some chicken friends 🙂  She reminds me a lot of a little girl I volunteered with in my youngest’s kindergarten class, Daniza.  Now, who would you want your 6 year old to play with: Jazzmyn with her sassy mouth and stripper heels, or Daniza and her cute chickens?

Another thing I like about Sonia is that each month she puts one of her dolls up for auction on Ebay with some of the proceeds benefiting a different charity.  Bindi, the dolly at the top of this story, was auctioned off this month for just over AUD1000 with proceeds to go to The Indigenous Literacy Foundation.  Ah.May.Zing.

I love everything about this.  The social responsibility piece.  The recycling.  The positive body image message for young girls.  The entrepreneurial spirit of a mum from Tassie!  Love.  Love.  Love.  Don’t you?

The Best Jumbleberry Jam Evah

Jumbleberry Jam is my absolute favourite.  It is hard to come by and so when I do I stock up and make it last for as long as I can, scraping the very last skerrick out of the jar and even using my fingers to wipe up the last drip from the plate before putting the dirty dishes in the sink.  Why is it so hard to come by?  Because I make it myself, that’s why.  Truly, it is the best. My grandmother taught be how to make jam when I was very little.  I remember her melting wax in a small pot to pour over the top of the finished jarred jam to create an airtight seal for preservation and storage.  I use the 2 piece lids with the wax seal on the outside but otherwise our techniques are pretty much the same.  This is how we do it.

Step 1 – You’ll need to set up a hotwater bath canner, like this one, to process the jarred jam which will seal it and keep in shelf stable for up to (or even longer than) 1 year. image You also need some sterilized glass jars to put the jam in, and 2 piece lids to seal the jars.  I handwash my glass jars well in hot, soapy water before putting them in the boiling-water filled canner to keep hot and sterile while I make the jam. image It is important to put the hot jam quickly in to hot, sterile, jars and then back in to the hot water canner to keep bacteria at bay.  I find it easy to keep every clean, hot and easily accessed by doing it this way.  I remember my grandmother used to keep her clean jars in a low oven to keep them hot while preparing her jam, but she didn’t process them in the water canner the way I do (she used the melted wax to seal the jars, remember?) If you are nervous about using a hot water canner, don’t be.  Here is a link to some more info if you need to do some research before going any further.

Step 2 – Pick, wash, sort and crush your berries.  Any berries you like are fine.  I like to use a variety to make my Jumbleberry Jam normally strawberries, blueberries and blackberries.  Today I used strawberries we picked locally from the most fabulous organic farm back in May, some of which I froze in preparation for today’s Jumbleberry Jam making event.  Yes, it is really so good I plan well ahead.

image    image

The blueberries are fresh from the farmers market.  The blackberries are boringly from the supermarket.  It is totally ok to mix and match. You’ll need 5 cups of crushed berries to make 5 large jars of Jumbleberry Jam.  What I do is put the cleaned berries in a large pyrex jar and use a potato masher to crush and measure the berries at the same time (clever, huh?).  Just keep adding different berries until you get to 5 cups of crushed berries. imageStep 3 – Once you get to 5 cups put the crushed berries in a large saucepan over high heat, add a packet of powdered pectin and 1/2 tsp of butter to the pan and start stirring.  Pectin is a naturally occuring substance found in ripe fruits that can be added to jams and jellies to help them set.  You can find it at the supermarket.  There is also a low sugar version you can try but I’ve only ever used the full-monty, regular version.

image

Not at all certain why this picture is sideways. My apologies.

Step 4 – Bring the berry mix to a rolling boil while stirring all the time.  A full rolling boil is when the bubbles won’t dissipate even when you stir it.

Step 5 – Use the large pyrex jug to measure out 7 cups of sugar.  I use regular white sugar but you can use organic, or even brown sugar if you want.  Understand though that it is a lot of sugar.  A LOT.  That’s the truth about jam and it will shock you and make your teeth itch just to look at it, but 7 cups of processed white sugar is what you use.  Pour the whole amount of sugar in to the pot and keep stirring.

image

Truthfully, this is a pic from when I made Strawberry Rhubarb jam a few weeks ago. I forgot to take a pic of my cooking Jumbleberry Jam today. Is much the same though – you can see all the sugar going in.

Keep cooking and stirring over high heat and bring the berry and sugar mix back to a rolling boil.  Boil hard for 1 minute.

Step 6 – Pour cooked jam in to the hot, sterile, jars and put the filled jars back in the hotwater canner to keep hot.  I like to use a pair of rubber tongs to llift the jars in and out of the water, and a funnel to ladel the hot jam in to the jars. image 
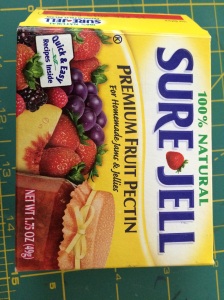
Wipe the rim of the jar with a wet paper towel before fitting the 2 piece lid on.

Step 7 – Once all the jars are filled lower the rack back in to the hotwater canner and bring the water back to a boil.  Process the jars in the boiling water for 5 minutes.  Remove them and let them cool on a wire rack. imageimage

As the jars cool you will hear the lids ‘pop’ as the changes in pressure create the airtight seal.  I’ve never had a jar fail to seal before but the way you test it is by pressing gently in the centre of the lid.  If it pops up and down then the seal did not work and the jam must be kept refrigerated and eaten first. image 
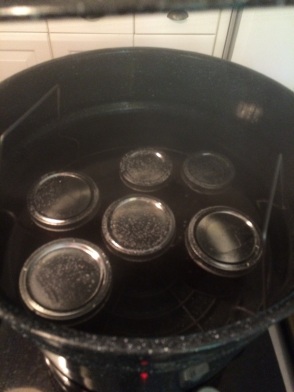
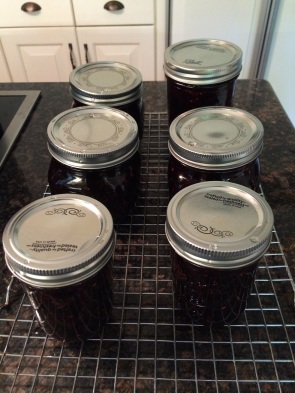
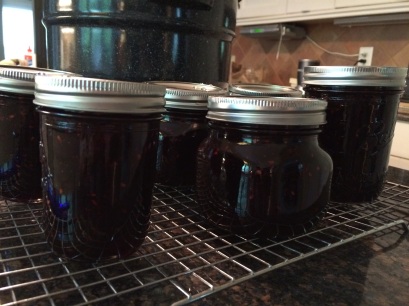
Step 8 – Voila!  The best homemade Jumbleberry Jam Evah!  Don’t forget to print up some cute labels for your jars.  Believe me, after a few months you will absolutely forget what kind of jam it is that you made and you’ll be glad you did. Homemade jam makes wonderful gifts (I think) for teachers, babysitters and friends who need a boost.  I hope you try it.  Making jam is easy, satisfying and a delicious treat.

Who’s Been Eating My Garden?!

I’m not happy.

I feel like the Three Bears who come home to find their house trashed and their porridge eaten.  ‘Someone’ has been munching on my garden and I’m not happy about it.  Normally I’m quite philosophical about sharing nature’s bounty with all creatures great and small but this time I say enough!

Just yesterday I was admiring my variegated hydrangea, noting its lush, bushy foliage and its obvious verdant health.  And then this morning I woke up to this:

image

image    image

Carnage and devastation.  All that lush foliage eaten down to sticks and nubbies.  Grrrrr.

And then I found my okra.  The same okra I had been admiring just yesterday for its lush, verdant foliage and cute baby okras it is starting to grow.  Which now looks like this:

image

More carnage and nubbies.  Grrrr.

My raspberries have fared no better …

image

… nor my peppers or tomatoes, although I suspect a two legged predator may have ‘harvested’ the later.  Grrrrrr.

And then, to add insult to injury, wanna see what I found in the mulch?

image

Hoof prints!  Grrrrrr.

Clearly I need better deer defences.

Last year I used these deer repellent stakes with much success and so I put them in again this year.  

This year they are not working.  Grrrrr.

I’m not happy.

How do you keep the deer away?  Short of filling them with lead I’m open to just about anything.

Grrrrr again.

And sigh.

How to Keep Your Cool When the Temp Heats Up

We are in the second week of June and already melting through our first heatwave of the summer.  The temperature today is expected to reach 99*F (37*C) with temps climbing to 101*F (38*C) tomorrow and remaining about the same over the next 16 days.  Truly, it feels like we are walking on the surface of the sun and it is only June!  #WhyDoesItFeelLikeAugust?

The kids and I are hiding out inside in the AC enjoying a Wii marathon and dreading the swim meet we have to go to tonight (or at least I am) but how are the new plantlings managing outside?  I didn’t put them in all that long ago and certainly not enough time has passed for them to have established robust root systems.  They all may well fry within the next two weeks.  Sigh.  But I’ll tell you what I did do to help get them through the start of a brutal summer.

1. Install drip irrigation systems.

I love drip irrigation.  It is easily found at all the big box stores, is not that spendy, and is easy to DIY.  I have it all through most of my gardens and they are all connected to timers which, really, is my favourite part about the drip irrigation – I don’t have to keep remembering to turn the water on, move the sprinklers, or turn it off again!  The ultimate in set-it-and-forget-it lazy gardening.

Drip irrigation also increases water efficiency as the water is only ever placed exactly where it needs to go – at the root zone of each plant – rather than sprayed from above drenching everything in the garden whether it needs watering or not.  The effects of evaporation can be lessened when the timer is set to water in the early morning hours before the sun rises, and reduced once again if the emmiters are placed underneath the mulch.  Just awesome all around.

2. Add extra layers of mulch

Not only does a thick layer of mulch smother out any weeds but it acts as a barrier between the hot burning sun and the soil underneath, literally holding the water in the ground and preventing it from being evaporated by the sun.  It also helps regulate the temperature of the soil reducing stress on plant roots.  I spent last weekend adding an extra few inches of mulch around the plants I thought would be most vulnerable to the weather this week.  I hope it helps.

3. Water deeply, but infrequently

When I water I try to water more deeply but less often, say 20mins, 3 times a week rather than 10mins a day.  This encourages roots to dig deeper into the soil in search of water rather than staying close to the surface in order to sip at more frequent water sprinklings that never get to soak in.  Long term, a nice deep root system will produce a more robust plant that is better able to handle temperature extremes as the added layers of soil the plant has above its roots will insulate the roots from the temperature changes.  Clever, right?

4. I use baby diapers in the bottom of hanging baskets (really, I do!)

I don’t remember where I heard this tip but I’ve been using it for years and it really helps.  Try putting a (clean) baby diaper in the bottom of your hanging baskets and pots.  The crystals inside the diapers will retain lots of water which the plants can ‘sip’ from when they start to get dry.  At the end of the season you can just throw the diapers away as you normally would, or even dry them out and keep them for next year.  They last quite a few seasons (it’s not like the crystals wear out) and I feel less guilt if I get a few uses out of them rather than just adding them to the landfill so quickly.

Admittedly, not all my plants are perfectly sited and some are probably in more sun than their labels said they would like (sigh) but with these added measures maybe I’ve done enough to help get them through the worst of this weather.  Fingers crossed!

It’s The End of the World … I Mean School Year.

It’s the end of the school year here in America and we are all losing our minds.  Why is it that everything gets crammed into the last two weeks of school?  Final assessments and last minute assignments.  Multiple class parties that need hard-to-find supplies to be sent in on time.  Poetry recitals and Fun Days that need costume preparation and volunteering.  Daily after school swim team practice with late night, school night, meets (wha??).

I know it is a lot of fun but when all the varying facets of our lives decide to ‘have fun’ simultaneously it all becomes rather chaotic and stressful.  And too much.  The regular ebb and flow of our routine is lost and anarchy follows.  There are more tears than usual.  More drama.  More drive-thru-dinners.  Mamas with school aged children, tell me I’m not alone!  It’s madness, right?

But I finally hit a new low last night.  My better half is out of town which means that I’m flying solo.  Cub scouts is usually his domain but yesterday it, along with everything else, was mine.  Our domestic cubby was getting ready for his meeting and came to me just minutes before we had to leave with a badge that had fallen off.  Last night was their big Moving-Up-To-The-Next-Cubby-Level night so a presentable uniform was key.  And his had a badge that was missing.

There was no time to sew and the fabri-tack wasn’t cutting it so I **stapled it back on to his shirt and called it done**.  I present my shame here:

Evidence that Mama has reached her limit.

Evidence that Mama has reached her limit.

Looks ok from a distance.

Looks ok from a distance, right?

There is a popular blog post going around called the Worst End of School Year Mom Ever.  Definitely worth a read and it is with only moderate amounts of shame that I can admit that I.Am.That.Mom.  But let’s face it.  We all are at this time of the year, right?  Just limping, limping by until summer holidays come to save us.

But that’s when the real work starts when I stare down the barrel of 10 long weeks (10 weeks!!  More madness!) of Cruise Director-ship.  In a desperate attempt to be proactive I have already installed structure and rules around how much reading, outside activity, and chores must be completed before any glowing rectangular devices can be turned on.  Yeah, we’ll see how long that lasts.

Just dialing it in.  Sigh.

“What is a Food Forest?”, You Ask?

Remember I was telling you about a local guy who takes note of all the publicly available fruiting trees that are in our area and he makes a point to harvest the fruit rather than let it spoil and go to waste?  Such activity is called Urban Foraging and I talked about it here.

So guess what?  I’m not the first one to be amazed by the idea that there is food, real food, literally hanging off trees all around us that we could, you know, eat.  Others have come across this notion too and have totally taken it to the next level.  Check this.

The city of Seattle has devoted 7 acres of land less than 2 miles from the city center to create a ‘Food Forest’.  “What’s a food forest?”, you ask?  I know.  I didn’t know either.  But it is a community partnership which will eventually create a true woodland ecosystem made up entirely of edible trees, shrubs, annuals and perennials, nut trees and berry patches and fruit trees, and family vegetable plots from which anyone can harvest anything.  An urban forager’s delight!  What an incredible concept.  They broke ground early summer 2011 and now this is what the Beacon Food Forest looks like:

It is hard to believe that all this food is free for the taking.  Like, anyone can just walk in and pick whatever looks good to take home and eat that night.  Hard to believe, right?  Here is a recent news article that tells the story.  And for the more visually inclined, here is a great video by the founders of the Beacon Food Forest that explains it all.

I follow them on Facebook now and I love to hear all their news.  They hold monthly work parties that really do look like fun that I soooo want to be a part of!  They run summer camps for the kids, hold yoga classes, do seed swaps, provide lots of education on organic gardening and cooking from the food you’ve grown.  And they had rhubarb compote made from their own rhubarb at May’s work party.  Awesome.

All very 360 degrees and very well conceived.  I just love it and will (one day) definitely take a trip out to visit the Beacon Food Forest.

I think this is such an incredible community outreach project.  Wow, folks.  Just. Wow.

I (heart) My Garden

I do.   I love my garden at this time of year.  Even though it is a dreary, wet and rainy day at my house there is still so much to see.  Forgive my indulgence but here are some of my (current) favourite things growing in my garden.

Lovely nasturtiums that are ‘acting’ as companion plants in my vege garden.  They are supposed to keep all kinds of bugs away and attract beneficial insects but all I see is a big fat black bug taking up residence right inside that lovely crimson nasturtium.  Hmmm.  What is that guy and what’s he doing in there?

IMG_2829   IMG_2833

I love my blueberry hedge.  I have 3 bushes planted along my fenceline and although they are still small (only 3 years old) I am excited that all three are fruiting well.  I have thrown bird netting over the top to see if I can harvest any for myself this year.  Birds beat me to them all last year.

IMG_2834

I love my hydrangeas, too.  I have three Endless Summer Hydrangeas that the boys bought me for Mothers Day a few years back that are blooming pink this year.  Our soil is typically acidic which would normally produce blue flowers so I was pleasantly surprised to see these big pink balls pop up.  Perhaps it was something in the compost I gave them ….  I love the mottled white/pink when they first start to bloom.

IMG_2857  imageIMG_2855     IMG_2856

Honestly, they are exposed to too much afternoon sun and don’t get near enough water to do really well so I totally bow down and give mad props to any plant for blooming despite the not-so-great location I’ve asked it to grow in.  Gotta love a team player like that!

I’m sure you don’t remember the ugly and under-perfoming Winter Daphne I pulled out earlier this spring.  You can read about my sad Winter Daphne journey here.  Happily, I replaced my sad Winter Daphne with happier Mini Penny Hydrangeas.  They’ve grown pretty well, I think, given that they’ve only been in the ground for 3 months AND have given me almost two whole blooms!  More reasons to love hydrangeas.

From this in March:

Newly planted Mini Penny Hydrangea.  Grow, baby, grow!

Newly planted Mini Penny Hydrangea. Grow, baby, grow!

To this in May:

image  image image

Not bad, eh?  I’m a little concerned they are going to be fried in the late summer afternoon sun but maybe they’ll be ok.  Hmmmm.

My one hydrangea sadness is my variegated hydrangea, Hydrangea macrophylla ‘Mariesii’.  It looked like this when I bought it from the nursery:

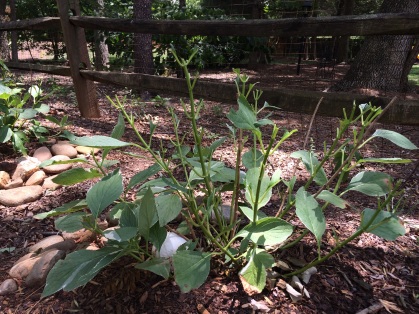
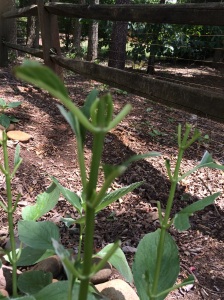
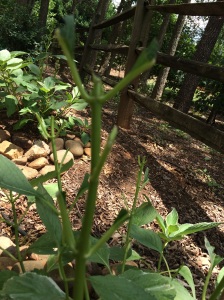
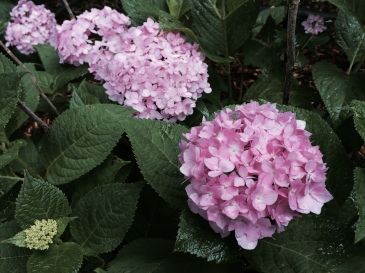
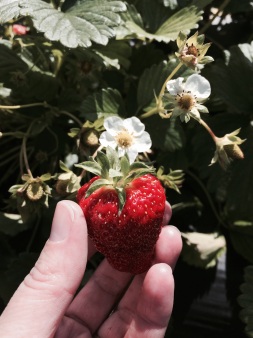
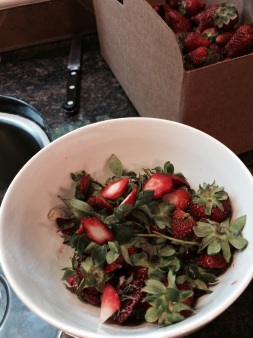
So pretty, right?  But every year in my garden it looks like this:

IMG_2835Boooo.  Stupid thing blooms on old wood and every year the buds are either lost to a brutal winter or to an early frost.  Sigh.  I’m not certain if I’m going to stick with such an underperforming plant although the variegated leaves might be worthwhile.  If It will ever grow bigger than 3′ it can stay.  Jury is definitely still out on this one.

My hummingbird garden is doing a little better this year with the Black and Blue Salvia and Bee Balm finally blooming.  They don’t look like much right now but my hope is that in a few years they whole bed will be filled with these lovely, hummingbird friendly, flowers.

image   image

Gardenias are starting to bloom and I can smell their fragrance waft right across the garden.  Just lovely.  I do wish they would get a little more sun as I’m sure they’d bloom better.  They catch a lot of shade from my neighbour’s trees.

IMG_2858   IMG_2860 IMG_2862

And the girls have been doing their thing.  I love our chickens.

Girls

Girls

IMG_2863

I think May/June might be my favourite time of year in the garden.  There is so much to see without it all being overwhelming yet.  What’s growing in your garden right now?

Do you play Jeopardy?

I’ll take Urban Renewal for 200, thanks Alex.

Answer: The world’s smallest urban park.

GreenEggs:  What is … Mill Ends Park?

YES!  On my cyber travels I happened upon one of the strangest things I’ve ever happened upon … in a gardening sense, that it.  The World’s Smallest Urban Park – can you believe it?  Mill Ends Park, a diminutive two-foot circle and only just big enough for one plant, sits in the middle of a median strip on what is now SW Naito Parkway, in Portland, Oregon.    It also happens to be home to the only leprechaun colony west of Ireland, although that point seems overlooked by the Guiness Book of Records.  Can’t imagine such a place?  Here’s a picture.

Mill Ends Park, Portland OR.  The smallest park in the world and home to the only leprechaun colony West of Ireland.

Mill Ends Park, Portland OR.

The story goes that in 1948 the site was prepared for a light pole to be installed on busy SW Front Avenue.  Time passed and the lightpole never arrived, yet weeds and nasties sprung up as they do when a plot of ground is left unattended.  Dick Fagan, a columnist with the Oregon Journal planted some flowers on the site, declared it a park and named it after his column in the paper, Mill Ends.  The park was officially dedicated on St Patrick’s Day, 1948, as “the only leprechaun colony west of Ireland”, according to Fagan.

From Wikipedia:

Legend

Fagan told the story of the park’s origin: He looked out the window and spotted a leprechaun digging in the hole. He ran down and grabbed the leprechaun, which meant that he had earned a wish. Fagan said he wished for a park of his own; but since he had not specified the size of the park in his wish, the leprechaun gave him the hole.[4] Over the next two decades, Fagan often featured the park and its head leprechaun in his whimsical column. Fagan claimed to be the only person who could see the head leprechaun, Patrick O’Toole.[3]

Fagan published a threat by O’Toole about the 11 o’clock curfew set on all city parks. O’Toole dared the mayor to try to evict him and his followers from Mill Ends, and threatened a leprechaun curse on him should he attempt to do so. Subsequently, no legal action was taken, and the leprechauns were allowed to stay in the park after hours.[5]

Evolution

Fagan died of cancer in 1969, but the park lives on, cared for by others. It was named an official city park in 1976.[2]

The small circle has featured many unusual items through the decades, including a swimming pool for butterflies—complete with diving board, a horseshoe, a fragment of the Journal building, and a miniature Ferris wheel which was delivered by a full size crane. On St. Patrick’s Day, 2001, the park was visited by a tiny leprechaun leaning against his pot of gold and children’s drawings of four-leaf clovers and leprechauns.[2] The park continues to be the site of St. Patrick’s Day festivities. The events held here include concerts by Clan Macleay Pipe Band, picnics, and rose plantings by the Junior Rose Festival Court.[3]

Mill Ends Park in 2004 before remodeling.

Mill Ends Park in 2004 before remodeling.

I love the absurdity, I love the leprechauns and I love the teeny tiny park!  But it is not all roses and hollyhocks though.  There is a contender for the title of World’s Smallest Urban Park and they are not going down without a fight!  Prince’s Park in the Staffordshire town of Burntwood, UK is challenging Mill Ends Park in the teeny tiny park stakes, claiming that Mill Ends isn’t really even a park to start with!  Prince’s Park is a full 15’x30′ in size and boasts home to the first and only World’s Shortest Fun Run, a full 55 strides around.

Not far to go now!

Not far to go now!

In 2003, nearly 400 people showed up to race around Prince’s Park completing the race in just 7 seconds flat!  Awesome!

So, which do you think has the best ‘small park spirit’?  Are you Team Portland or Team UK?  I can’t get past the cute factor of Mill Ends Park but the World’s Shortest Fun Run at Prince’s Park is a really fabulous community event.  I’m torn but leaning towards Team UK.  You?

Urban Foraging

It’s funny the way some things happen, isn’t it?

I came across a post in my recent cyber travels about a fellow Charlottean, Mike Orell, who is (apparently) wild about the amazing tree canopy that we have here in The Queen City.  In case you didn’t know, Charlotte is known for having one of the finest urban forests in America and it is one of our most recognized and treasured natural resources.

The Charlotte Skyline. See all the trees? Amazing for a city of about 1 million people, right?

I have to admit that I love the trees, too.  One of my favourite things about Charlotte is the abundance of green and the trees are definitely a big part of that.  Sadly, our urban forest is old, fragile and depleted and is at risk of being irrepairably lost if action is not taking to better preserve it.  Fortunately in 2010, our city council recognised the canopy’s importance and launched a bold public/private collaborative, TreesCharlotte, whose task was to assess the condition of the canopy, support and protect the existing trees, and set a goal of planting over 500,000 trees over the coming decades.  It is largely volunteer driven and has been very successful to date.  A truly wonderful community project with a lasting legacy. Trees are important.  Trees are beautiful.  And they increase our land values.

Typical tree lined suburban Charlotte street.  Gorgeous, right?

Typical tree lined suburban Charlotte street. Gorgeous, right?

Anyway, I came across this post, via Trees Charlotte, written by Mike that talks about Urban Foraging.  Have you heard about Urban Foraging?  That is, going out into our public urban environments to find, harvest, and eat fruits (or veges or whatever) that are publicly available, are ripe, and would ordinarily rot on the vine and go to waste if folks weren’t out there collecting them.  What a notion.  Mike talks about the different fruit trees that he’s noticed around his/my areas, when they are fruiting and how often he beats the critters to the bounty 🙂

And then I realised that *I* am an Urban Forager, too.  Well, in that there is this amazingly enormous fig tree along one of my running routes that is simply ladened with fruit in the Autumn, and that I have been known to slow and enjoy a fresh sweet fig or two from its offerings as I pass.  My running buddies think I’m mad.  I’m ok with that.

And then I thought of the people I see walking along the walking paths in Florida carrying the fresh coconuts home that had fallen the night before.  And I realised that *they* are Urban Foragers, too.

Florida coconuts

Florida coconuts

And I remembered the NPR segment I heard months ago about a global (global!) online project called Falling Fruit that crowd sources locations of publicly available fruits and maps them, so you can go and be an Urban Forager in your own piece of the world.  Amazing!

And then my friend, Sarhn at GreenerMe, posted just yesterday about her adventures collecting wild Slippery Jack mushrooms.  Turns out that she’s an Urban Forager, too!  And I remember going ‘mushrooming’ after a rainfall in the Autumn months as a child so I guess I’ve been doing it for a long time, afterall.

It is just all around me right now.  Funny how sometimes things like that happen, right?  All at once?

But what does all that meeaaaannn???  I dunno.  But I like the advice Mike gives: To “pick your head up and start to really see what’s around you”.  Good advice for life, really.

Are there any other Urban Foragers out there?  Perhaps you are an UF and just never knew it (like me)?

Poppies Poppies Everywhere – ANZAC Day 2015

The 5000 Poppies Project is Complete!

You may remember I crocheted a red poppy in memory of my Great Grandfather, to donate to the 5000 Poppies Project for the 100th anniversary of the ANZAC Day landings in WWI.  I blogged about it here.

Poppy for ANZAC Day

Poppy for ANZAC Day

My little poppy winged its way to Melbourne months ago and was incorporated into the art piece known as 5000 Poppies, now installed at Melbourne’s Federation Square.   When the organisers originally started this project 2 years ago they were hoping to collect 5000 Poppies to display, thinking that was a super ambitious number.  Guess how many poppies it takes to produce a result like this?

Fede

5000 Poppies at Federation Square, Melbourne

By the end they had received over 250,000 (!!) handmade poppies created by over 30,000 individuals from all over the world!  An extraordinary example of community organising that has beautifully found the sweet spot between the emotional, remembering the fallen and those who have served – and the practical, that knitting and crocheting poppies is easy enough for just about anyone to do so participation was easy and high.  It turns out that 250,000 handmade poppies creates over 800 square metres (that’s over 8600 sq ft, for those who still use the old money) of poppies!  A true ‘Field of Poppies’, which was, after all, the actual point of the exercise.  Many have dedications attached to them.  I wish I had thought to do that.

I particularly love this amazing sculpture created by a local, Melbournian metal fabrication plant, Uniweld Engineering, under the direction of artist Adrian Egglestone: entitled GRATITUDE.  Stunning.

Gorgeous sculpture by Adrian Egglestone entitled: Gratitude

Gorgeous sculpture by Adrian Egglestone entitled: GRATITUDE

GRATITUDE

GRATITUDE

I don’t know why but I can’t get the video feed to link right now.  To see some video footage to get a true appreciation of the scale click here for link to SBS News’ footage.  And here for some newspaper coverage.

5000 Poppies will be on display in Federation Square, Melbourne, from Thursday April 23 – Sunday April 26 after which it is starting a national tour around the country.

So glad I could participate in such an extraordinary event.

Happy ANZAC Day.

Lest we forget.